
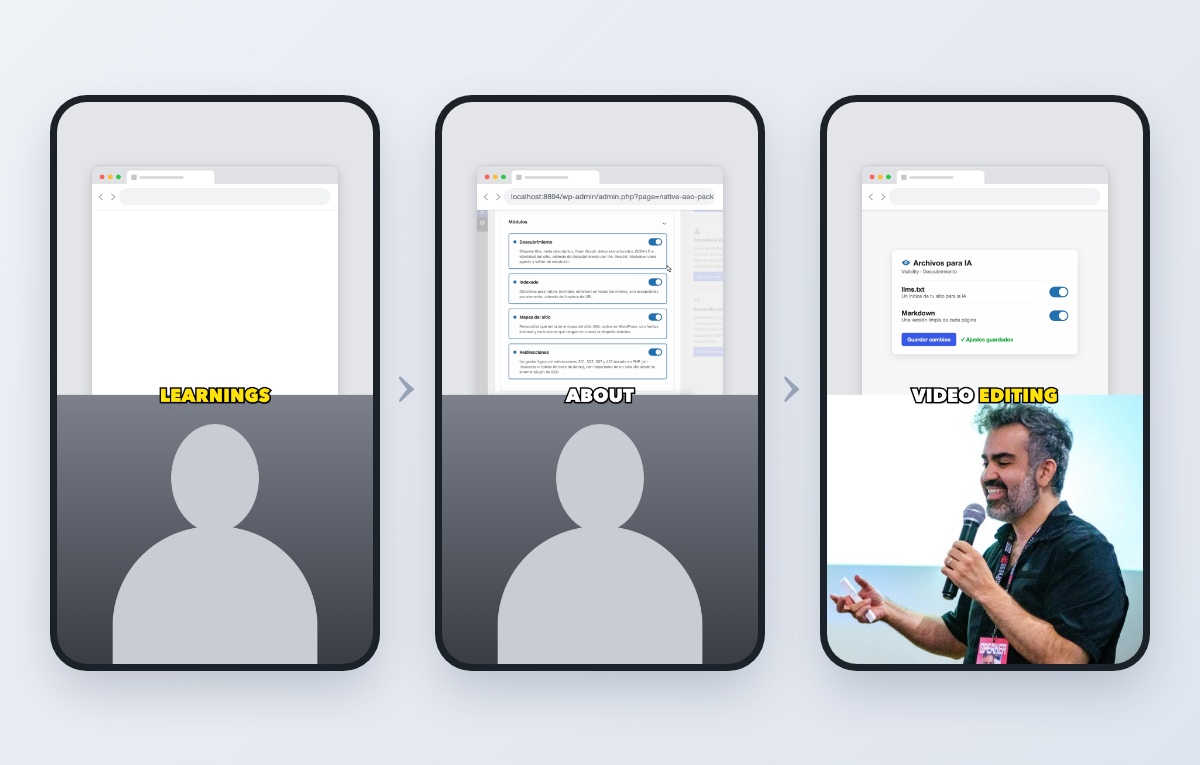
Over the last few weeks I made a series of short vertical videos about WordPress plugins, some for my own work and some for the WP Latam community. The examples here come from two of them: Almost Ready Temporary Page, my own plugin, and Fernando Tellado’s SEO plugin Visibility.
This is the route I ended up with. It is personal: it uses Final Cut Pro, a local WordPress install for every plugin, and Claude Code driving the browser while I record. But most of the lessons apply whatever your tools are.
My route, step by step
- Start with the plugin: explore it locally, then decide the story and script one line per beat, with every claim verified.
- Build a demo site: believable content, snapshots, and admin and visitor sessions.
- Design for the phone: decide the window, the safe areas and where the subtitles go.
- Record like a camera: zoomed shots, complete corners, cuts instead of pans.
- Clean the frame: dim, replace or simplify what isn’t the point.
- Animate or show: pick real footage, an animation or a freeze frame for each beat.
- Assemble in Final Cut Pro: crop each take to the window, generate the project and review it full screen.
- Subtitle and export: timed to the real voice with natural cadence, then export at full quality.
1. Start with the plugin, not the script
Install the plugin on a fresh local site and click through every screen before writing a single line. Exploring first changes the script: features that are off by default become scenes of their own, claims get checked against what the plugin really does, and the best moment is often something you did not plan, like the notice a plugin shows right after you activate it.
2. Build a demo site that tells a small story
Generic “Hello world” content makes every screen look empty. Give each demo site a believable small business, like a flower shop or a coffee shop with a few posts, an FAQ page and a recipe.
- Use the language of the audience, with a locale that has real translations for the plugin.
- Keep it fictional: no real addresses, no real businesses, no personal accounts on screen.
- Two hostnames, two sessions:
localhostis the admin and127.0.0.1is a logged-out visitor. Same browser, separate cookies, nobody logs out on camera. - Snapshot the database so every retake starts from the same state.
3. Design for the phone, not the editor
What looks safe in Final Cut is not what people see. A modern iPhone screen is taller than a 9:16 video, so TikTok zooms the video in until it fills the height, and the extra width falls off the sides. On a 1080×1920 video that means roughly 100 px lost on each side in the feed. On top of that, the interface covers the top, the bottom and the right-hand buttons.
My layout: a low-detail browser window about 840 px wide, ending at the vertical middle, the speaker below, and subtitles on the seam. The window tells people “this is a website” without competing with the content, and a dark incognito-style window makes “a visitor sees this” visible.

Note: measure the safe area on a real phone. A screenshot of a published video showed that the For You feed crops more than the profile view, and the window width now comes from that, not from guesses.
4. Record the screen, but direct it like a camera
The recording is landscape and the video is vertical, so every scene is really a zoomed shot.
- Zoom toward a corner and keep that corner complete. A half-cut admin bar reads as a mistake.
- Cut, don’t pan. Long camera moves drag unrelated text across the screen and are hard to follow.
- Frame the words, not the boxes. Titles and notices in wp-admin are often full-width elements; frame the text itself.
- The pointer never covers text. It rests after the label or in the button’s padding.
- Type fast. Nobody needs to watch every letter appear.

Note: I only have one screen, and it’s busy recording Chrome in full screen. With Claude Code’s remote control I approve takes and give feedback from my phone, without touching the Mac and breaking the shot.
5. Clean the frame: dim, replace, or simplify
When you zoom into one module, everything around it competes. Decide for each shot:
- Dim it when the surroundings read as calm background, like a sidebar or the editor canvas behind a settings panel.
- Replace it with an animation when the screen is confusing or full of small related text. Two switches turning on and a “Settings saved” message explain more than a page of help paragraphs.
- Simplify raw text like
llms.txtor Markdown: big type, headings highlighted, URLs faded, one comfortable margin.

6. When to animate and when to show the plugin
- Show the real plugin when the action is the point: activating, clicking a menu, a preview changing as you type. Real footage builds trust.
- Animate when the idea is abstract or the real screen is too busy: a before/after, a comparison, a closing summary.
- Freeze a frame when the narration runs longer than the action. Holding a clean frame keeps the screen split for the whole video. Check the exact frame you freeze.
7. Final Cut Pro: generate the project, then review it
I don’t build these timelines by hand anymore. A small script writes an FCPXML project: the speaker on the bottom storyline, each take scaled into the browser window, the window as a PNG overlay, and every subtitle as an editable title. I import it, review it full screen in the viewer, and only then export.
For the speaker I record vertically in 4K, sync external audio in Final Cut, and let the script place and crop the clips so there is breathing room between the subtitles and the head.
Note: every change is a new project (v1, v2, v3…) imported into the same event from a generated FCPXML, so comparing versions is easy. One rule: never re-cut a clip under the same name, or the older projects that use it break.
8. Subtitles: size, color and cadence
- Short phrases, about 13 characters, so they stay well inside the safe area.
- Style: heavy white uppercase with an outline and shadow, and one key word in yellow.
- Cadence: quick inside an idea, a short pause between sentences, a longer one between sections. Evenly spaced subtitles feel robotic.
- Time them to the real voice. Transcribing each cut separately gives timings you can trust.
- The words and the picture must agree. A line about visitors should play over what a visitor sees.
Note: whisper.cpp does the timing. I extract the audio from the video, cut it on the speech pauses and transcribe each piece; short chunks gave reliable word timestamps where one long file drifted. Then I fix what it mishears, like “safe” instead of “Save”.
Leave a Reply